
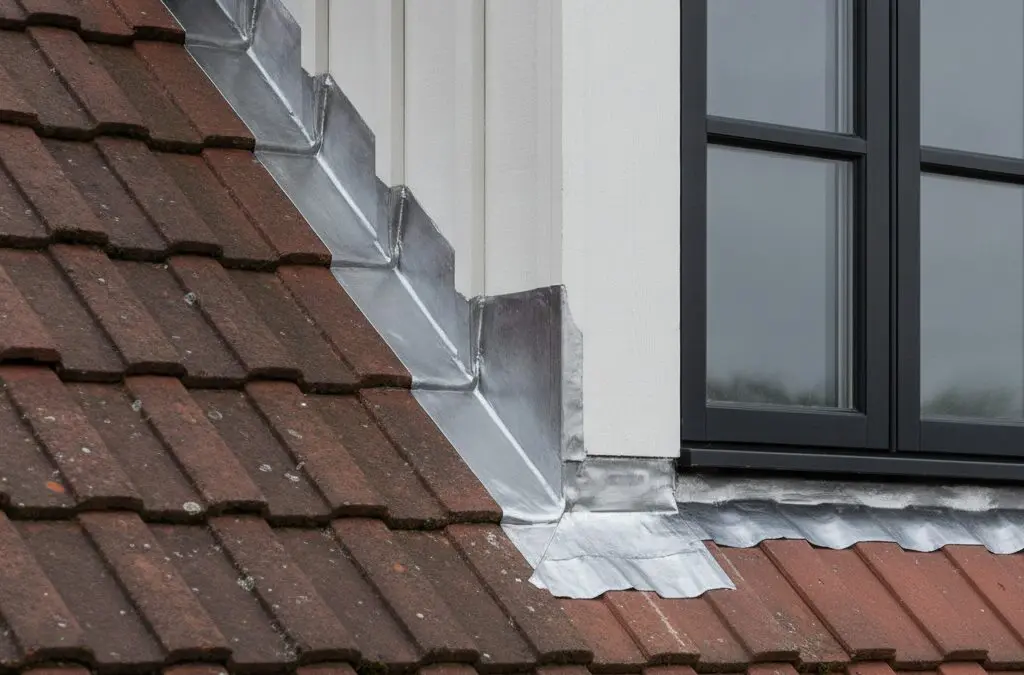
Lead Flashing Repairs: Bay Windows, Dormers and Extensions in Sheffield
AJR Roofing — Sheffield & South Yorkshire
A damp patch on the ceiling below a bay window, dormer or extension is a frustrating problem — and lead flashing failure is one of the most common causes. The good news is that flashing repairs are usually straightforward when caught early. The bad news is that they’re easy to miss until water damage has already built up inside.
This guide explains what lead flashing does, where it’s most likely to fail, how to spot the signs of a problem and what repairs typically cost in Sheffield.
- Lead flashing seals the junction between a roof and a wall, window or chimney
- Most common failure points: bay windows, dormers, extension abutments
- Signs of failure: damp patches inside, water running down walls, cracked or missing lead
- Repairs often take half a day or less for a single location
- Cost in Sheffield: typically £150–£400 per location, depending on access and extent
- Ignored flashing leaks cause timber rot, plasterwork damage and mould
What Is Lead Flashing and What Does It Do?
Lead flashing is a strip of lead sheet used to waterproof the junction between two different building surfaces — most commonly where a roof meets a vertical wall. Lead is the material of choice because it’s flexible, durable, easy to shape and can last 50–100 years when properly installed.
You’ll find flashing at:
- The top of bay window roofs where they meet the house wall
- The sides of dormer windows where they meet the main roof slope
- The abutment where a lean-to extension meets the rear wall
- Around chimney stacks (step and back gutter flashing)
- Roof verges, valleys and around skylights
When flashing is correctly installed and in good condition, water simply can’t get past it. When it fails, the leak pathway is direct into your home.
Why Does Lead Flashing Fail?
Lead flashing is tough, but it’s not immune to problems. Common causes of failure include:
Thermal movement cracking
Lead expands and contracts significantly with temperature. Over time, this movement can cause fatigue cracking, particularly at folds and joints. Old-style flashing installed in long runs without expansion joints is especially prone to this.
Pointing failure
Flashing is typically fixed by chasing (cutting) it into the mortar joint of a brick wall and then pointing over it. When that mortar cracks, shrinks or is washed out by rain, the flashing can lift or pull away from the wall — leaving a gap for water to enter.
Poor original installation
Flashing that wasn’t properly dressed (pressed into shape) against the surface it seals, or that was fixed with the wrong materials, may fail well before its natural lifespan.
Physical damage or theft
Lead is soft and can be dented or distorted by falling debris or maintenance work. Lead theft is also a genuine problem on accessible flat roofs and bay windows — if lead has been stolen, the repair is urgent.
Bay Window Flashing: A Common Problem in Sheffield
Bay windows are one of the most common sources of flashing-related leaks in Sheffield’s older housing stock. The bay window roof — typically a small flat or pitched section — meets the main house wall with a lead flashing joint. On Victorian and Edwardian terraces, this joint may be over a century old.
Signs of a failing bay window flashing:
- A damp patch on the bay window ceiling, often appearing in one corner
- Water running down the inside of the bay window wall after rain
- Peeling wallpaper or paint on the bay window internal wall
- Visible cracking, lifting or gaps in the lead strip on top of the bay
A roofer can usually inspect and repair a bay window flashing in half a day. The lead is carefully lifted, the chase is cleaned out and re-pointed, and the flashing is re-dressed and secured. In some cases where the lead is old and cracked, it will be replaced entirely.
Dormer Flashing Repairs
Dormers have multiple flashing points — both the side cheeks (where the dormer wall meets the main roof) and the top (where the dormer roof meets the main wall above). Any of these can fail.
Signs of dormer flashing failure:
- Damp on the bedroom ceiling, especially at the edges
- Water coming in around the sides of the dormer window
- Staining on the dormer cheek walls inside or outside
- Visible cracking or lifting in the lead strips on the dormer sides
Dormer flashing repairs can be slightly more complex than bay window repairs, depending on the dormer’s design and height. But in most cases, an experienced roofer can complete the work in a single visit.
Extension Abutment Flashing
Where a lean-to or flat roof extension meets the main house wall, a horizontal flashing (called a soaker or apron flashing) seals the junction. This is one of the highest-risk flashing points on a property, because it runs the full width of the extension — any gap means water can track along the entire joint.
Failed extension abutment flashing often causes:
- Damp patches spreading across the extension ceiling
- Water running down the internal wall at the back of the extension
- Wet insulation in the extension roof space
Repairs typically involve re-pointing the chase, re-dressing the flashing and — if necessary — replacing the lead and adding a cover flashing above for extra protection.
What Does Lead Flashing Repair Cost in Sheffield?
| Job type | Typical cost |
|---|---|
| Bay window flashing repair (re-point and re-dress) | £150–£250 |
| Bay window flashing replacement (new lead) | £250–£400 |
| Dormer side flashing repair | £200–£350 |
| Extension abutment re-flashing | £300–£600+ |
| Scaffold or MEWP (if needed) | Add £200–£400 |
These are indicative figures. The best way to get an accurate cost is to send us a photo of the problem area — we’ll give you an honest assessment of what’s involved before any work starts.
When Is It Worth Replacing vs Repairing?
If your lead flashing is less than 20 years old and the failure is localised (a single lifted section or failed pointing), a repair is usually the right call. If the lead is old, cracked across multiple sections or has been patched multiple times, replacement will be more cost-effective in the long run.
Why Act Quickly on Flashing Leaks?
Flashing leaks tend to start small and get worse. Water entering at a flashing joint can travel horizontally before appearing as a damp patch — so the visible damp may be some distance from the actual entry point. Over time, a flashing leak will cause timber rot, damaged plasterwork, mould growth and deteriorating insulation.
A repair that costs a few hundred pounds now can prevent thousands of pounds of internal damage if left unchecked.
Frequently Asked Questions
How long does lead flashing last?
Quality lead flashing, properly installed, can last 50–100 years. The failure point is usually the mortar pointing that holds it in the wall, rather than the lead itself — which is why re-pointing is such a common and effective repair.
Can I seal lead flashing myself with mastic?
You can — but it’s a temporary fix. Sealant degrades within a year or two, and can trap water behind it if it fails partially. A proper repair by an experienced roofer is always better value over time.
Will I need scaffolding for a flashing repair?
Often not — many bay windows and single-storey extension repairs can be carried out from a ladder or hop-up with appropriate safety measures. Higher-level dormer repairs may require scaffolding or a mobile elevated work platform.
Does buildings insurance cover lead flashing repairs?
Flashing failure due to wear and tear is usually classed as maintenance and not covered. However, if the flashing has been damaged by a storm or sudden event, you may have a valid claim. Document the damage with photos and check your policy.
Related guides from AJR Roofing: